

Discover what saponizacao is, how it works in soap making, and why it’s essential. Learn practical tips, examples, and FAQs about this fascinating chemical process.
Introduction
saponizacao is more than just a scientific term; it is the foundation of soap making, a process humans have relied on for thousands of years. Whether you’re a hobbyist interested in crafting your own soaps or simply curious about what happens behind the scenes in your bathroom, understanding saponizacao offers insight into the chemistry of cleanliness. This article will explore the saponification reaction in detail, explain how it works, discuss its applications, and provide practical tips for anyone wanting to delve into soap making.
What is saponizacao?
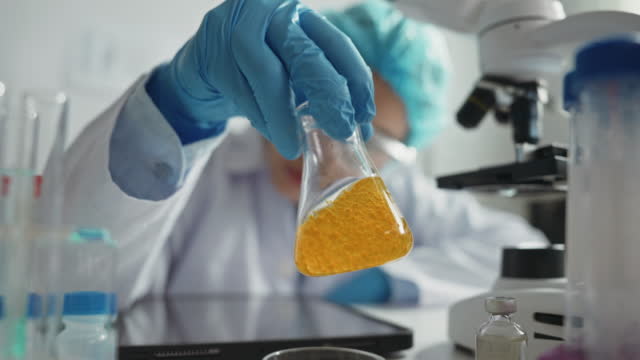
saponizacaois a chemical reaction where an ester, typically a triglyceride found in fats and oils, reacts with a strong inorganic base such as sodium hydroxide (NaOH) or potassium hydroxide (KOH). This process produces soap, which is the salt of fatty acids, and glycerol (glycerin). It is the essential reaction behind traditional soap making, turning oils into cleansing agents that remove dirt and grease.
The Chemistry Behind saponification
At its core, saponification involves breaking down triglycerides — molecules consisting of glycerol bonded to three fatty acids — through a reaction with a base. When triglycerides react with sodium hydroxide (NaOH) or potassium hydroxide (KOH), the ester bonds are hydrolyzed, releasing glycerol and forming soap molecules. The fatty acids bind to the base’s metal ions, producing salts (soap). This process is crucial because it transforms fats, which do not mix well with water, into water-soluble compounds that clean effectively.
Types of Bases Used in saponification
The two most common bases in saponification are sodium hydroxide and potassium hydroxide. Sodium hydroxide produces hard, solid soaps commonly used in bar soaps, while potassium hydroxide results in softer, sometimes liquid soaps. The choice of base affects the texture, hardness, and solubility of the soap. For example, soaps made with potassium hydroxide are often found in liquid soaps or shaving creams due to their softer consistency. Understanding this helps soap makers tailor their products for specific uses.
The Role of Oils and Fats in Soap Making
Different oils and fats influence the properties of the final soap. Common oils include olive oil, coconut oil, palm oil, and animal fats like tallow. Each oil has a unique fatty acid composition that affects lather, hardness, moisturizing ability, and cleansing power. Coconut oil, for example, produces a bubbly lather but can be drying, while olive oil results in a moisturizing, gentle soap. By blending oils, soap makers create balanced products optimized for skin types and preferences.
Step-by-Step saponizacao Process in Soap Making
-
Preparation: Gather oils/fats and the appropriate amount of sodium or potassium hydroxide. Safety gear like gloves and goggles is essential.
-
Mixing the Base Solution: Slowly dissolve the hydroxide in water to create a caustic solution. This step requires caution due to the solution’s corrosiveness.
-
Combining Oils and Base: Heat oils until liquid, then slowly add the base solution while stirring continuously.
-
Saponification Reaction: The mixture thickens as the chemical reaction proceeds, forming soap and glycerol.
-
Curing: After pouring into molds, soaps require curing for several weeks to allow excess water to evaporate and complete the chemical process, resulting in a firm, long-lasting bar.
Practical Tips for Successful Soap Making
Always measure ingredients accurately to ensure the complete reaction of oils and lye — unreacted lye or oils can cause skin irritation or spoilage. Use a reliable saponification calculator to balance your recipe. Maintain clean equipment and consistent temperatures for even mixing. Curing time is critical; rushing this phase may produce a softer soap prone to spoilage. Adding natural additives like essential oils or herbs can enhance fragrance and appearance without compromising soap quality.
Comparing Cold Process vs. Hot Process Saponification
The cold process involves mixing oils and lye solution at lower temperatures, allowing saponification to occur slowly during curing. It preserves delicate ingredients but requires longer curing times. The hot process applies external heat to speed the reaction, allowing soap to be used sooner. Each method has benefits: cold process yields smoother bars with finer textures, while hot process soap is faster to produce and more rustic in appearance. Choosing between them depends on your production goals.
Environmental and Health Benefits of Saponification
Soap made through traditional saponification is biodegradable and often free from harsh chemicals found in commercial detergents. It’s gentle on the skin and environment, especially when natural oils and organic ingredients are used. Additionally, glycerol byproduct is a humectant, adding moisturizing properties to soap. Unlike synthetic surfactants, saponified soaps reduce chemical runoff pollution and support sustainable personal care choices.

Common Mistakes to Avoid in Saponification
One frequent error is inaccurate lye measurement, leading to incomplete saponification or excess lye residue, which can irritate skin. Another is overheating oils or the lye solution, which can degrade delicate oils and affect soap texture. Failing to cure soap long enough results in soft bars that degrade quickly. Avoid using metal containers that react with lye — glass or stainless steel is best. Proper ventilation during mixing is important to avoid inhaling fumes.
Applications Beyond Soap Making
While soap production is the most common use, saponification also applies in biodiesel manufacturing, where triglycerides are converted into fatty acid methyl esters. Additionally, it’s used in laboratories to analyze fat content in food and in the cosmetic industry for producing emulsifiers and detergents. Understanding saponification can open doors to various fields beyond everyday household products.
Conclusion
saponizacao is a fascinating chemical reaction that transforms everyday oils and fats into cleansing soap, combining chemistry with creativity. Understanding its principles allows you to craft soaps tailored to your preferences while ensuring safety and quality. Whether you’re a beginner or an experienced soap maker, mastering saponification opens up endless possibilities for natural skincare and sustainable living.
Ready to start your soap-making journey? Gather your ingredients, follow best practices, and experience the art and science of saponizacaofirsthand. Your skin—and the planet—will thank you!
Frequently Asked Questions (FAQs)
1. What is the difference between saponizacao and hydrolysis?
Saponification is a type of hydrolysis where an ester reacts specifically with a base (usually NaOH or KOH) to form soap and alcohol. Hydrolysis is a broader term for any chemical breakdown by water.
2. Why is glycerol important in soap making?
Glycerol is a natural moisturizer and byproduct of saponification. It helps keep skin hydrated and soft, enhancing the soap’s moisturizing qualities.
3. Can I use any oil for saponification?
Almost any fat or oil containing triglycerides can be saponified, but the choice affects soap quality. Some oils create harder soaps, while others produce softer bars with different lather properties.
4. Is soap made by saponification safe for sensitive skin?
Soap made from natural oils and fully reacted lye is generally safe and gentle. However, fragrances or additives may cause irritation for some individuals. Patch testing is recommended.
5. How long does the saponification process take?
The chemical reaction starts immediately but typically takes several hours to complete. The soap then needs weeks of curing for optimal hardness and mildness.
Read also: comfiguraçoēs Understanding and Using Settings Efficiently